Showing posts with label DIY. Show all posts

Wednesday, July 10, 2013

Make your own Almond Milk and Almond Flour


I hate getting old. Well, sometimes I hate getting old. Honestly, you couldn’t pay me to go back to my 20’s. They weren’t awful years, but I find it easier to be content these days. I suppose most, if not all of that has to do with my relationship and commitment to God. He taught me how to love my husband and he taught my husband how to love me, all after we had been married over ten years. It turns out, being incredibly in love with my best friend and having the privilege to be married to him makes me happy. Who knew?  I didn’t realize how superficial and selfish I was until God changed my heart.

What I hate about getting old is the physical changes. I have to eat about half the amount of food and I have to exercise twice as much to lose weight as I did in my 20’s. My hair is thinner and it takes more coffee to get motivated in the morning. Also, I can no longer eat things I have always been able to eat.

About a year after my son was born I started losing my hair, by the handful. I didn’t know what was going on. I was pretty worried. I lived in Western Washington at that time and going gluten free seemed to be the biggest trend, it seemed like everyone was doing it. So I decided to try it. Three days after I removed gluten from my diet I felt a noticeable change. It was like my steps had gotten lighter. I was walking on air! I felt wonderful and energized. A few days later, my hair had stopped falling out. It was great. Avoiding gluten wasn’t ideal but at least I was able to function at a normal energy level.

It wasn’t long after that, I noticed my stomach hurt when I drank milk. Not good! I love milk and cheese and yogurt and ice cream and the list goes on and on. Not only do I love dairy, but my breakfast usually includes a protein shake. How do I make a protein shake without milk?

That’s where today's post is helpful. If you can’t make your protein shake with dairy milk, make it with almond or coconut milk. I prefer almond, so that is what I will be sharing today. I’ll save coconut milk for another day.

There are a few reasons to make your own almond milk. One very good reason is chemicals. Typical almond milk from the grocery store has preservatives and other chemicals in it. When I make it myself, I know exactly what is in it and don't have to question whether it may be harmful or not. I find comfort in that. Another reason is price. Almond milk at the grocery store is pretty expensive. If you get your almonds in bulk, it costs less than half the price to make it. Lastly, I make it is because of my gluten sensitivity. I can’t tolerate wheat flours and almond flour is one of my favorites to bake with. It is perfect for low carb baked goods. After the almond milk is strained, the almond “pulp” can be dehydrated and ground for flour. I have a recipe for Low Carb almond bread and it is amazing!! I made gluten free subs with it for the Super Bowl this year.

This recipe is pretty simple, but you have to plan a little.

·         Soak one cup of almonds in water overnight (or at least 8 hours)

·         After soaking, drain and rinse Almonds.

·         Put almonds and 6 cups of distilled water in a high power blender (I use my Ninja).

·         Blend on High.Strain almonds in a nut bag (I don’t use a nut bag, I use a piece of muslin I got at the fabric store. It strains beautifully and is reusable).

·         Add 1 teaspoon of vanilla if desired


Bottle and refrigerate the almond milk for up to 4 days.
Continue if you want to make almond flour with your almond meal. You can also mix the almond meal as is with spices and bread meat with it.

·         Spread almond meal over parchment paper on a cookie sheet.

·         Place in oven, with oven on lowest temperature, for 1 to 2 hours, until dry. *Leave oven door open!!

·         Grind meal and store. I use my magic bullet; you can use a coffee grinder or any type of grinder with a flat blade.

This milk should have 35 to 40 calories per serving, similar to the low calorie Almond Milk at the grocery store. If you like your almond milk creamier, use less water. If you want to drop the calorie or fat content, try adding water. This is a very flexible recipe and is easily altered to fit your Almond Milk needs.

As I wrote this post, I asked myself a few questions. Some of these are questions I wish I had asked myself ten years ago. What stage of life are you in? Do you ever wonder what your future self would think of you now? Do you ever question your priorities or motives; question whether they really matter in the grand scheme of things? If you are unhappy, is it possible you are looking for the wrong things to make you happy? Are you putting your hope for happiness in eternal things, or in fleeting things?


May Your Joy Be Full,

Rachel


4 Even to your old age I am he, and to gray hairs I will carry you.

 I have made, and I will bear; I will carry and I will save.

Isaiah 46:4 (ESV)

 If you enjoyed my post today, Follow me on Facebook Mommy Who Loves God


Wednesday, July 3, 2013

Ways to Use and Repurpose a Gallon of Milk--Without Drinking It!! PART 3: Make Greek Yogurt with a Gallon of Milk and a Crock Pot


Today, before I get into the "how to" section of this post, I want to talk about a story. In Matthew 25 of the New Testament, Jesus tells us a story of a master and 3 servants. He gave all three servants talents (money) to steward, or be responsible for, while he was gone. The first servant was given 5 talents, while the second was given 2 talents and the third was given one. The first two servants invested their talents and doubled what they were given, while the third servant buried his talent in the sand because he was afraid of his master. When the master came back, he praised the first two servants, who doubled their talents. He told the first one, "Well done, good and faithful servant. You have been faithful over a little; I will set you over much." However, he was very angry at the third servant for being lazy and not trusting his master enough to do as he was told. He called him a wicked and slothful servant.
I feel,as a homemaker, I can relate to this story in many ways. I don't know how to invest money, that is not one of my gifts. I do, however, know (or am learning) how to stretch money. In the last month, I have brought my grocery bill down from $150 to $100 a week.  That's a saving of $200 a month!! I have to admit I can't buy organic, grass fed meat, and I have to be decisive on which produce items I can buy organic, but my family has access to whole, healthy foods and our budget is just a little bit easier to manage. I am trying my best to "be faithful over a little," even if it means taking the time to make some of our food myself. I don't want my slothfulness or laziness to cost my family money we could be saving or investing.

Of all of our grocery items, Greek Yogurt is one of my favorites. It is the most versatile ingredient in my kitchen. I use it to replace sour cream in everything, mashed Potatoes with a small amount of Greek Yogurt are fantastic!!  A few days ago I made a wonderful broccoli salad using Greek Yogurt and honey. I use it to make salad dressing and my husband mixes it with Sriracha and puts it on everything!! It goes in my morning protein shake and my son wants it with honey every morning for breakfast. What can't you use Greek Yogurt for? I don't think there is a better way to add a little good gut bacterium to your diet.


My little guy could be a Yogurt spokesperson!!
So, what is the problem?

 It's good for you, it's versatile, is there a problem?

 It is expensive. A quart of Greek Yogurt at Costco costs about $5. With the amount of yogurt we consume, we could easily spend $20 a month on yogurt, if not more. I can buy hamburger for the month, or a gym membership for the same price. And this isn't even organic!! I believe my beloved Greek Yogurt is worth that much, but why pay so much for something when you don't have to. A penny saved is a penny earned. With this recipe, I can fill 2 Costco containers of FAGE Greek Yogurt for about $3. Yes, you heard me, three dollars. One Gallon of milk will make a little more than 2 quarts of Greek Yogurt.

"I don't want to buy a special yogurt maker," you might say. That's good. Yogurt makers don't make enough yogurt to feed my family's yogurt habit for a day, much less a week. All you need is a good old fashioned crock pot, an oven and a couple of towels and you are on your way to thick, creamy, wonderful Greek Yogurt.

How to Make Greek Yogurt with a Gallon of Milk and a Crock Pot:
Here is what you need:


  • One Gallon of Milk
  • At least a 6 quart Crock Pot
  • Thermometer - I use a digital thermometer that has an alarm on it
  • 1 1/2 cups of starter yogurt ( I used FAGE Greek yogurt)
  • Oven
  • 2 Towels
  • Very Large bowl
  • Very Large Strainer
  • Large piece of cheesecloth or muslin cloth (I use muslin because it's reusable and strains better)
  • Spoon
  • 2 one quart container to store your Greek Yogurt

  1. Pour milk into crock pot.
  2. Heat on high for 2 to 3 hours, until temperature reaches 175-180. This kills any bacteria in the milk and prevents the milk from forming curds.
  3. Once milk reaches 175 to 180 degrees, turn off slow cooker, uncover and allow milk to cool to 115-110 degrees.
  4. Once milk is cool, turn on you oven to lowest setting. Add your starter yogurt and stir all of the lumps out.
  5. While you are stirring the yogurt, turn the crock pot back on high until the outside of the pot is hot to the touch.
  6. Wrap your ceramic pot with lid in two large towels. I wrap one around it each way.
  7. Turn off you oven and place the pot wrapped in towels in the oven.
  8. Leave the pot in the oven for 12 hours. You may need to remove your oven rack.
  9. After 12 hours, remove the pot, it should still be a little warm on the bottom. Whisk the yogurt to get the clumps out.
  10. Put your strainer in your large bowl, line you strainer with muslin cloth and pour yogurt into strainer. Let it set for at least an hour, stirring occasionally. I usually let mine drain for several ours to get really thick yogurt
  11. Take out 2 1/2 cups of yogurt and put in a container for a starter for your next batch. Label it accordingly so it doesn't get eaten.

    
    This is our bounty!! I turned 1 gallon of milk into
    2 quarts of Greek yogurt and enough whey to
    make another pie and feed my herb garden
    for a couple of weeks. I more than doubled my talents!!

  12. Put yogurt into your containers for storage. I have three FAGE containers that I clean and reuse. That way I can make it and store it if we haven't finished one from a previous batch.
  13. Enjoy your homemade Greek yogurt!!

I got these instructions from: Pounds for Pennies


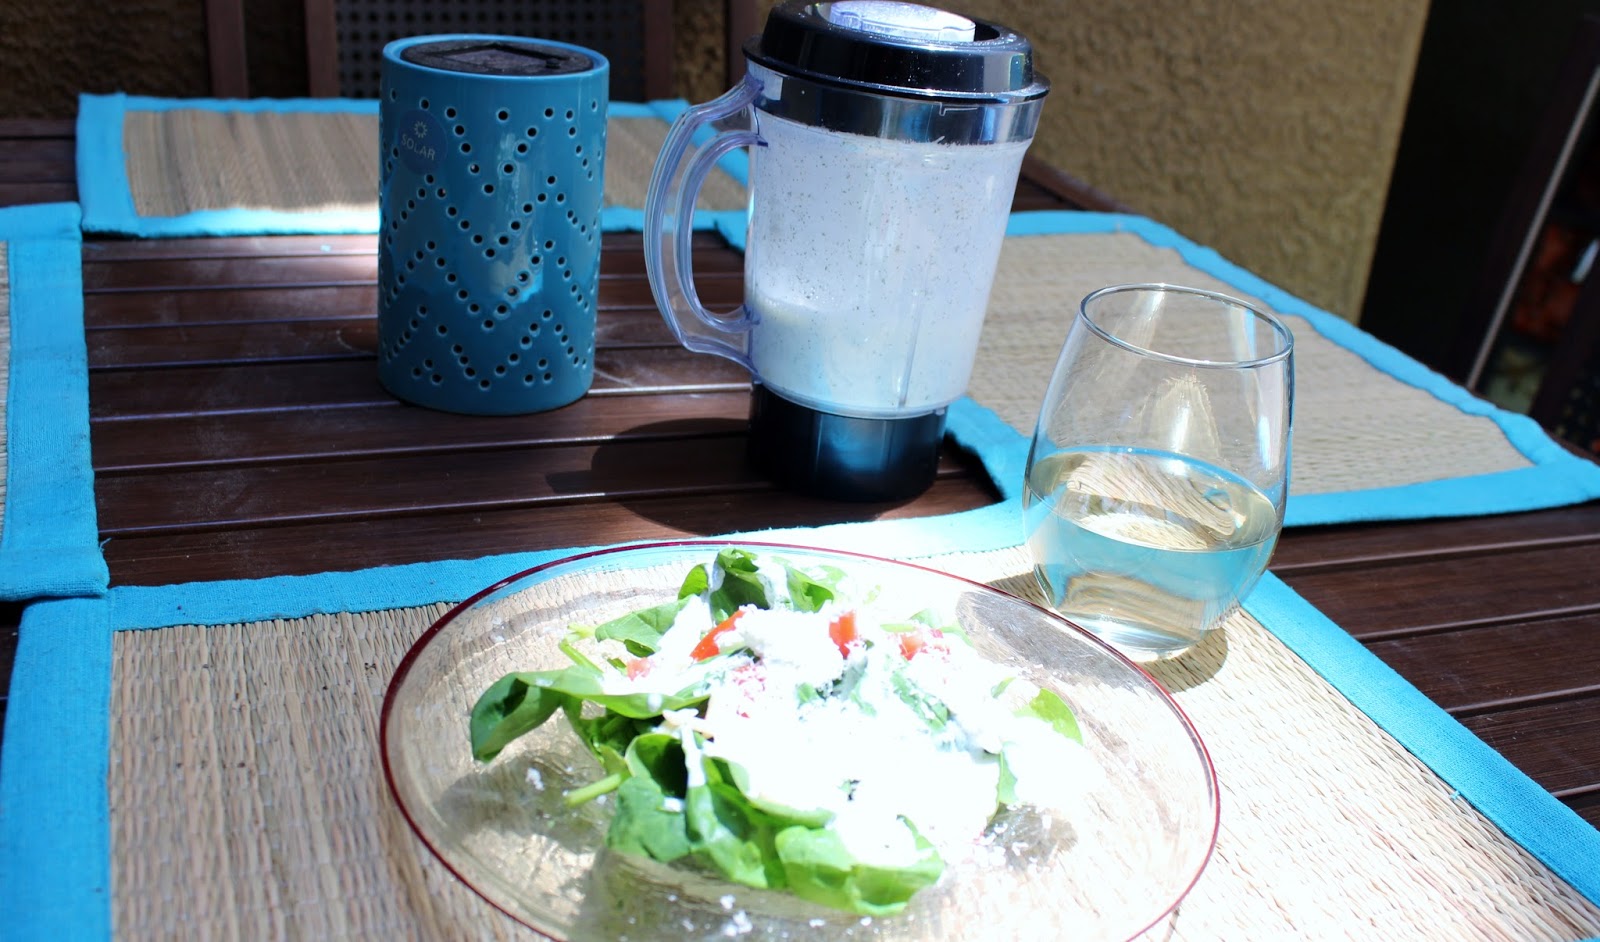
Have any of you seen the new salad dressing trend? Fewer calories when you buy salad dressing made with Greek Yogurt!! Sometimes it costs over $4 a bottle. Here is a recipe from "Your Grocery Budget Toolbox" by Anne Simpson of Authentic Simplicity.
  • 1 cup of sour cream or plain Greek yogurt
  • 1/4 cup of buttermilk (I make my own, 1/4 teaspoon of white vinegar or lemon juice in a measuring cup, fill to 1/4 cup with milk. Let stand for 5 minutes.)
  • 1 teaspoon of dried chives
  • 1 teaspoon of dried dill
  • 1 teaspoon of dried parsley
  • 1/2 teaspoon of garlic powder
  • salt and pepper to taste

Mix together in a bowl or blend in a blender(I like to use my magic bullet). Refrigerate several hours before serving. Use more milk for thinner dressing or less for a dip.

I also used some ricotta cheese from my mozzarella cheese
making experiments on this salad!!


Now that we've saved money on our Greek Yogurt, how else can we spend a little less frivolously? How can we be "faithful with few things?"

Thank You for reading my blog post. I hope you enjoyed it and took something good away with you.


May your joy be full,

Rachel


19 “Now after a long time the master of those servants came and settled accounts with them. 20 And he who had received the five talents came forward, bringing five talents more, saying, 'Master, you delivered to me five talents; here I have made five talents more. 23 His master said to him, 'Well done, good and faithful servant. You have been faithful over a little; I will set you over much. Enter into the joy of your master."
Matthew 25:19-23


If you like what you're reading, follow me on facebook:Mommy Who Loves God


Monday, July 1, 2013

Ways to Use and Repurpose a Gallon of Milk--Without Drinking It!! PART 1: Mozzarella And Ricotta Cheese


Well, it is finally summertime, and here in Northern Nevada we have the temperatures to prove it.

There are so many great and wonderful things that only summertime brings. We get to watch our kids splash in the pool or under a sprinkler to keep cool. Take trips to the lake or beach are always favorites. For me, even the scent of sunscreen changes my mood!! And I can't forget the sun tea, sometimes mixed with fresh lemonade.

One of the best reasons to celebrate summer is summer produce. Who doesn’t love fresh strawberries or peaches, maybe with some homemade ice-cream? I think my favorite this year is my basil plant. I have tried gardening flower beds in the past and have ended up with dried dirt and sticks. Who knew that gardens need water? Well, this year I tried again, but I have done something different. I get up and water my plants. And they are thriving. I also feed them once a week, but I’ll get into that later in the post.
 
My basil plant is growing so well I have more basil than I know what to do with. What do I do with all of this basil you may ask? I make caprice!!!  It’s summertime, so we have fresh basil and fresh tomatoes. All we need is fresh mozzarella cheese!!

 Today, I am going to make fresh mozzarella and fresh ricotta cheese. The reason I make ricotta cheese when I make mozzarella is because a byproduct of making mozzarella is a having lot of whey left over with cheese particles in it. I want all the cheese I can get from my gallon of milk. And besides, it gives me a great reason to make my husband’s favorite dish, lasagna (which I will tell you how to make in part 2)!!

So here we go!!

How to Make Mozzarella Cheese

The first thing I want to establish, I got my directions from instructables.com. I have looked all over the internet and tried many different instructions for making mozzarella cheese and this is the only one I could get to work. http://www.instructables.com/id/Great-Mozzarella-Cheese/?ALLSTEPS, http://www.instructables.com/id/Great-Ricotta-Cheese-From-Whey/?ALLSTEPS

Equipment:
1. At least an 8 quart pot either enameled or stainless steel. Do not use aluminum.
2. Thermometer. I got this one at Ikea for under $10 and it works great!!
3. Two measuring cups
4. Large strainer
5. Long knife
6. Slotted spoon
7. Large glass bowl
8. Small glass bowl
9. Microwave
10. Cheese cloth or muslin fabric (optional)
11. Rubber gloves (optional)
12. Small strainer

Ingredients:
1. 1 Gallon of Milk. I use whole milk because it is less processed than 2% or skim milk, but you should be able to use them if you prefer. If you have access to raw milk, that is best!!  What you want to be careful about is ultra-pasteurized milk. Most organic milk is ultra-pasteurized so it will keep longer. This will not make good mozzarella cheese. I tell you more about this later in the post. Let your milk sit out for a while until it gets to about 50 degrees.
2. 1 Rennet tablet crushed.
3. 2 teaspoons of Citric Acid divided. 1 teaspoon is dissolved in water and the other one is sprinkled directly into the milk. I found both Rennet and citric acid at our local beer brewers supply store. The prices were good and the salesmen were friendly. You can also get it online pretty easily.
4. 1/2 cup water water divided in 2. Use distilled water or bottled drinking water. Be sure not to use tap or chlorinated water.
5.1 teaspoon salt.

Directions

1.    Pour 1 teaspoon of Citric Acid into ¼ cup of water and stir. Crush the Rennet tablet and pour it into the other ¼ cup of water.
2. If you haven't done so already, pour your milk into your pot.
3. If your milk is not 50 degrees, turn on low heat until it is. When it reaches 50 degrees (or warmer is ok) put in your citric acid/water mixture and stir for about 1 minute.                                                                  
4. Next, sprinkle your dry citric acid into the pot and stir for another minute.                                                 5. Heat your milk to 88-90 degrees. I usually let it get to 88 and remove it from the burner to avoid too much heat in case of inaccurate thermometer.                                                                                            6. Add rennet/water mixture and stir for 15-20 seconds.                                                                               7. Put the lid on the pot and wait for 15-30 minutes, or until you get a “clean break.” Mine usually takes about 25 or 30 minutes.
This is what it should look like after stirring in the rennet, before letting it sit.


This is what your clean break should look like. When you stick your finger in it, the curd and whey should separate and not stick to your finger. If it is still watery, let it sit a bit longer. If you cannot get a clean break, your milk may be ultra-pasteurized. Even if it doesn’t say ultra-pasteurized, the manufacturer may overheat it and not put it on the label. In my experience, Kirkland milk from Costco does not make good mozzarella. It will, however make good ricotta. For this batch, I used Wal-Mart’s Great Value brand. This is the best batch yet!!!
2.    1. Cut the Curds into 1/2 inch cubes from top to bottom. Then do the same thing at a 45 degree angle.                                                                                                                                                              2. Let curds sit for 5 or 10 minutes, undisturbed.                                                                   

3.    1. Heat on very low heat to 108 degrees stirring occasionally, just enough to keep the curds separated.                                                                                                                                                    2. When the temperature is 108 degrees, turn off the heat and continue stirring every few minutes for another 20 minutes while the curds continue to shrink.

4.    1. You can either dip the curds out with a small strainer or drain the curds into a strainer. Let them strain for about 15 or 20 minutes until all the whey is drained out. Be sure to save the whey, you will need it for the ricotta cheese. There are also a few other things you can do with the strained whey but I’ll get into that later in the post.                                                                                                                                                              2.  Place the curds in a small glass bowl.
5.      1. Heat the curd in the microwave for 30 seconds.                                                                                       2. Using a slotted spoon or your hand, gently squeeze the whey from the curd and pour off the whey.

6.      Microwave again tor 15 to 20 seconds and squeeze the whey again working into a ball. Around this time, I put on some rubber gloves because the curd gets a little hot. Pour off the whey.

7.      Microwave, squeeze and pour, over and over until there is almost no whey sitting in the bowl after coming out of the microwave. I had to do this several times.  Add 1 teaspoon of salt. At this point it should start to get stretchy. Grab about 1/3 to ½ and lift. It should start to stretch under its own weight. If not, microwave for a few more seconds. Stretch and knead like dough. Knead it like bread into a ball, and microwaving when necessary, until smooth and shiny. It should look like the last picture when finished.


8.      You can then freeze it for an hour and shred for lasagna (recipe will be in part 2 of this post) or you can slice it up for some caprice!!!!
 

Now for the Ricotta!!

This one is pretty easy and quick.
1.     1. Boil the leftover whey, in the same pot, until it reaches 200 degrees. The temperature doesn’t really matter; just don’t let it boil over. You don’t want to clean up that mess.                                                                                                                                                                                   2. Stir and let cool. This doesn’t really have to be an exact temperature either; you just want it to be manageable. You don’t want to accidently spill boiling hot whey on yourself. It hurts.

2.     1. Line a very, very large strainer with a cheese cloth or muslin. I use muslin because it is reusable and strains better. I wash it with my kitchen towels then sterilize in boiling water.                                                                                                          2. Pour the whey and let drain, I usually let if drain for a couple hours, I don’t like mushy ricotta. Then package it up and refrigerate. I have a really good ricotta, basil and pea dip recipe if anyone is interested. This will also be going into the lasagna.


 Now, what to do with the Whey!!!


There are a few things you can do with it.

I water it down (a lot) and feed my plants with it every Monday. They are thriving (considering they are my plants and I have a reputation as a plant murder!!).

I also have a recipe, which I will be sharing with you in Part 2 of this post, for Old-Fashioned Lemon Whey Pie. I am gluten intolerant so this will be a gluten free version.

There are other uses also.  You can put it in smoothies or put in soups. Or you can just throw it out. I just like to get everything I can from my gallon of milk.

As for the carton, I like to use it to store my strained whey and I repurpose it as a water container. It only costs about 30 cents to fill up a gallon jug at the grocery store and costs anywhere from 79 cents to over a dollar to buy a full jug.


And that’s how you make Mozzarella and Ricotta Cheese using every last penny you spent on your gallon of milk. I apologize this is so long, I guess I should have split this into an additional part. Thank you for reading my blog, I hope you enjoyed it. Hopefully soon you will enjoy some freshly made mozzarella!! Stay tuned for parts 2 and 3, where I will be providing recipes using your cheeses and whey and showing you how to make Greek yogurt in a crock pot. Slice up some cheese and tomatoes, add some basil, salt and oil for some caprice and invite someone over to enjoy a summer snack!!

May Your Joy Be Full,

Rachel 


“Contribute to the needs of the saints and seek to show hospitality.”

Romans 12:13 (ESV)

“Show hospitality to one another without grumbling.”

1 Peter 4:9 (ESV)


As always, questions and comments are encouraged!!

Follow me on Facebook: Mommy Who Loves God

Sunday, June 30, 2013

Ways to Use and Repurpose a Gallon of Milk--Without Drinking It!!


After quitting my job to be a stay at home mom, our monthly income is almost half what it was.  God has provided my husband with a promotion and a raise, but it is still very hard to support a family on only one income. With this in mind, I feel part of my job, as my husband’s helper, is to steward our resources to the best of my ability. This means my goal is to not be frivolous with purchases and to create as little waste as possible.

With this in mind, I am trying to make many of the items that we use on a daily basis at home.  Not only does this save money, but it also gives me the opportunity to replace items that can be harmful and toxic with naturally made products.

My husband and I have very recently started a journey to become self-sufficient.  We want to rely on manufactured products for as little as possible. This looks like it’s going to be a slow process and we may never completely achieve this goal, but I think we will have a lot of fun trying. This will also give us projects to work on together, which means more quality time as a family!! Hopefully you will find some of our projects interesting or helpful.

So, without further ado, I’m going to announce my next few blog posts.

Ways to Use and Repurpose a Gallon of Milk!!!

This will be a three part post.

In part one; I will be making mozzarella and ricotta cheese, both from the same gallon of milk. I will also give ways to repurpose the whey and the carton.

In part two; I will provide you with healthy recipes to use your mozzarella and ricotta cheese. I will also give you a recipe to some of the whey.

In part three; I will show you how to make about two quarts of Greek yogurt with one gallon of milk in a crock pot. I will also provide a wonderful ranch dressing recipe to use with your home made Greek yogurt.

So check back tomorrow for part one on Ways to Use and Repurpose a Gallon of Milk!!!

May your joy be full,

Rachel

As always, questions and comments are welcome and encouraged!!

Follow me on Facebook: Mommy Who Loves God