Showing posts with label Recipes. Show all posts

Wednesday, July 10, 2013

Make your own Almond Milk and Almond Flour


I hate getting old. Well, sometimes I hate getting old. Honestly, you couldn’t pay me to go back to my 20’s. They weren’t awful years, but I find it easier to be content these days. I suppose most, if not all of that has to do with my relationship and commitment to God. He taught me how to love my husband and he taught my husband how to love me, all after we had been married over ten years. It turns out, being incredibly in love with my best friend and having the privilege to be married to him makes me happy. Who knew?  I didn’t realize how superficial and selfish I was until God changed my heart.

What I hate about getting old is the physical changes. I have to eat about half the amount of food and I have to exercise twice as much to lose weight as I did in my 20’s. My hair is thinner and it takes more coffee to get motivated in the morning. Also, I can no longer eat things I have always been able to eat.

About a year after my son was born I started losing my hair, by the handful. I didn’t know what was going on. I was pretty worried. I lived in Western Washington at that time and going gluten free seemed to be the biggest trend, it seemed like everyone was doing it. So I decided to try it. Three days after I removed gluten from my diet I felt a noticeable change. It was like my steps had gotten lighter. I was walking on air! I felt wonderful and energized. A few days later, my hair had stopped falling out. It was great. Avoiding gluten wasn’t ideal but at least I was able to function at a normal energy level.

It wasn’t long after that, I noticed my stomach hurt when I drank milk. Not good! I love milk and cheese and yogurt and ice cream and the list goes on and on. Not only do I love dairy, but my breakfast usually includes a protein shake. How do I make a protein shake without milk?

That’s where today's post is helpful. If you can’t make your protein shake with dairy milk, make it with almond or coconut milk. I prefer almond, so that is what I will be sharing today. I’ll save coconut milk for another day.

There are a few reasons to make your own almond milk. One very good reason is chemicals. Typical almond milk from the grocery store has preservatives and other chemicals in it. When I make it myself, I know exactly what is in it and don't have to question whether it may be harmful or not. I find comfort in that. Another reason is price. Almond milk at the grocery store is pretty expensive. If you get your almonds in bulk, it costs less than half the price to make it. Lastly, I make it is because of my gluten sensitivity. I can’t tolerate wheat flours and almond flour is one of my favorites to bake with. It is perfect for low carb baked goods. After the almond milk is strained, the almond “pulp” can be dehydrated and ground for flour. I have a recipe for Low Carb almond bread and it is amazing!! I made gluten free subs with it for the Super Bowl this year.

This recipe is pretty simple, but you have to plan a little.

·         Soak one cup of almonds in water overnight (or at least 8 hours)

·         After soaking, drain and rinse Almonds.

·         Put almonds and 6 cups of distilled water in a high power blender (I use my Ninja).

·         Blend on High.Strain almonds in a nut bag (I don’t use a nut bag, I use a piece of muslin I got at the fabric store. It strains beautifully and is reusable).

·         Add 1 teaspoon of vanilla if desired


Bottle and refrigerate the almond milk for up to 4 days.
Continue if you want to make almond flour with your almond meal. You can also mix the almond meal as is with spices and bread meat with it.

·         Spread almond meal over parchment paper on a cookie sheet.

·         Place in oven, with oven on lowest temperature, for 1 to 2 hours, until dry. *Leave oven door open!!

·         Grind meal and store. I use my magic bullet; you can use a coffee grinder or any type of grinder with a flat blade.

This milk should have 35 to 40 calories per serving, similar to the low calorie Almond Milk at the grocery store. If you like your almond milk creamier, use less water. If you want to drop the calorie or fat content, try adding water. This is a very flexible recipe and is easily altered to fit your Almond Milk needs.

As I wrote this post, I asked myself a few questions. Some of these are questions I wish I had asked myself ten years ago. What stage of life are you in? Do you ever wonder what your future self would think of you now? Do you ever question your priorities or motives; question whether they really matter in the grand scheme of things? If you are unhappy, is it possible you are looking for the wrong things to make you happy? Are you putting your hope for happiness in eternal things, or in fleeting things?


May Your Joy Be Full,

Rachel


4 Even to your old age I am he, and to gray hairs I will carry you.

 I have made, and I will bear; I will carry and I will save.

Isaiah 46:4 (ESV)

 If you enjoyed my post today, Follow me on Facebook Mommy Who Loves God


Wednesday, July 3, 2013

Ways to Use and Repurpose a Gallon of Milk--Without Drinking It!! PART 3: Make Greek Yogurt with a Gallon of Milk and a Crock Pot


Today, before I get into the "how to" section of this post, I want to talk about a story. In Matthew 25 of the New Testament, Jesus tells us a story of a master and 3 servants. He gave all three servants talents (money) to steward, or be responsible for, while he was gone. The first servant was given 5 talents, while the second was given 2 talents and the third was given one. The first two servants invested their talents and doubled what they were given, while the third servant buried his talent in the sand because he was afraid of his master. When the master came back, he praised the first two servants, who doubled their talents. He told the first one, "Well done, good and faithful servant. You have been faithful over a little; I will set you over much." However, he was very angry at the third servant for being lazy and not trusting his master enough to do as he was told. He called him a wicked and slothful servant.
I feel,as a homemaker, I can relate to this story in many ways. I don't know how to invest money, that is not one of my gifts. I do, however, know (or am learning) how to stretch money. In the last month, I have brought my grocery bill down from $150 to $100 a week.  That's a saving of $200 a month!! I have to admit I can't buy organic, grass fed meat, and I have to be decisive on which produce items I can buy organic, but my family has access to whole, healthy foods and our budget is just a little bit easier to manage. I am trying my best to "be faithful over a little," even if it means taking the time to make some of our food myself. I don't want my slothfulness or laziness to cost my family money we could be saving or investing.

Of all of our grocery items, Greek Yogurt is one of my favorites. It is the most versatile ingredient in my kitchen. I use it to replace sour cream in everything, mashed Potatoes with a small amount of Greek Yogurt are fantastic!!  A few days ago I made a wonderful broccoli salad using Greek Yogurt and honey. I use it to make salad dressing and my husband mixes it with Sriracha and puts it on everything!! It goes in my morning protein shake and my son wants it with honey every morning for breakfast. What can't you use Greek Yogurt for? I don't think there is a better way to add a little good gut bacterium to your diet.


My little guy could be a Yogurt spokesperson!!
So, what is the problem?

 It's good for you, it's versatile, is there a problem?

 It is expensive. A quart of Greek Yogurt at Costco costs about $5. With the amount of yogurt we consume, we could easily spend $20 a month on yogurt, if not more. I can buy hamburger for the month, or a gym membership for the same price. And this isn't even organic!! I believe my beloved Greek Yogurt is worth that much, but why pay so much for something when you don't have to. A penny saved is a penny earned. With this recipe, I can fill 2 Costco containers of FAGE Greek Yogurt for about $3. Yes, you heard me, three dollars. One Gallon of milk will make a little more than 2 quarts of Greek Yogurt.

"I don't want to buy a special yogurt maker," you might say. That's good. Yogurt makers don't make enough yogurt to feed my family's yogurt habit for a day, much less a week. All you need is a good old fashioned crock pot, an oven and a couple of towels and you are on your way to thick, creamy, wonderful Greek Yogurt.

How to Make Greek Yogurt with a Gallon of Milk and a Crock Pot:
Here is what you need:


  • One Gallon of Milk
  • At least a 6 quart Crock Pot
  • Thermometer - I use a digital thermometer that has an alarm on it
  • 1 1/2 cups of starter yogurt ( I used FAGE Greek yogurt)
  • Oven
  • 2 Towels
  • Very Large bowl
  • Very Large Strainer
  • Large piece of cheesecloth or muslin cloth (I use muslin because it's reusable and strains better)
  • Spoon
  • 2 one quart container to store your Greek Yogurt

  1. Pour milk into crock pot.
  2. Heat on high for 2 to 3 hours, until temperature reaches 175-180. This kills any bacteria in the milk and prevents the milk from forming curds.
  3. Once milk reaches 175 to 180 degrees, turn off slow cooker, uncover and allow milk to cool to 115-110 degrees.
  4. Once milk is cool, turn on you oven to lowest setting. Add your starter yogurt and stir all of the lumps out.
  5. While you are stirring the yogurt, turn the crock pot back on high until the outside of the pot is hot to the touch.
  6. Wrap your ceramic pot with lid in two large towels. I wrap one around it each way.
  7. Turn off you oven and place the pot wrapped in towels in the oven.
  8. Leave the pot in the oven for 12 hours. You may need to remove your oven rack.
  9. After 12 hours, remove the pot, it should still be a little warm on the bottom. Whisk the yogurt to get the clumps out.
  10. Put your strainer in your large bowl, line you strainer with muslin cloth and pour yogurt into strainer. Let it set for at least an hour, stirring occasionally. I usually let mine drain for several ours to get really thick yogurt
  11. Take out 2 1/2 cups of yogurt and put in a container for a starter for your next batch. Label it accordingly so it doesn't get eaten.

    
    This is our bounty!! I turned 1 gallon of milk into
    2 quarts of Greek yogurt and enough whey to
    make another pie and feed my herb garden
    for a couple of weeks. I more than doubled my talents!!

  12. Put yogurt into your containers for storage. I have three FAGE containers that I clean and reuse. That way I can make it and store it if we haven't finished one from a previous batch.
  13. Enjoy your homemade Greek yogurt!!

I got these instructions from: Pounds for Pennies


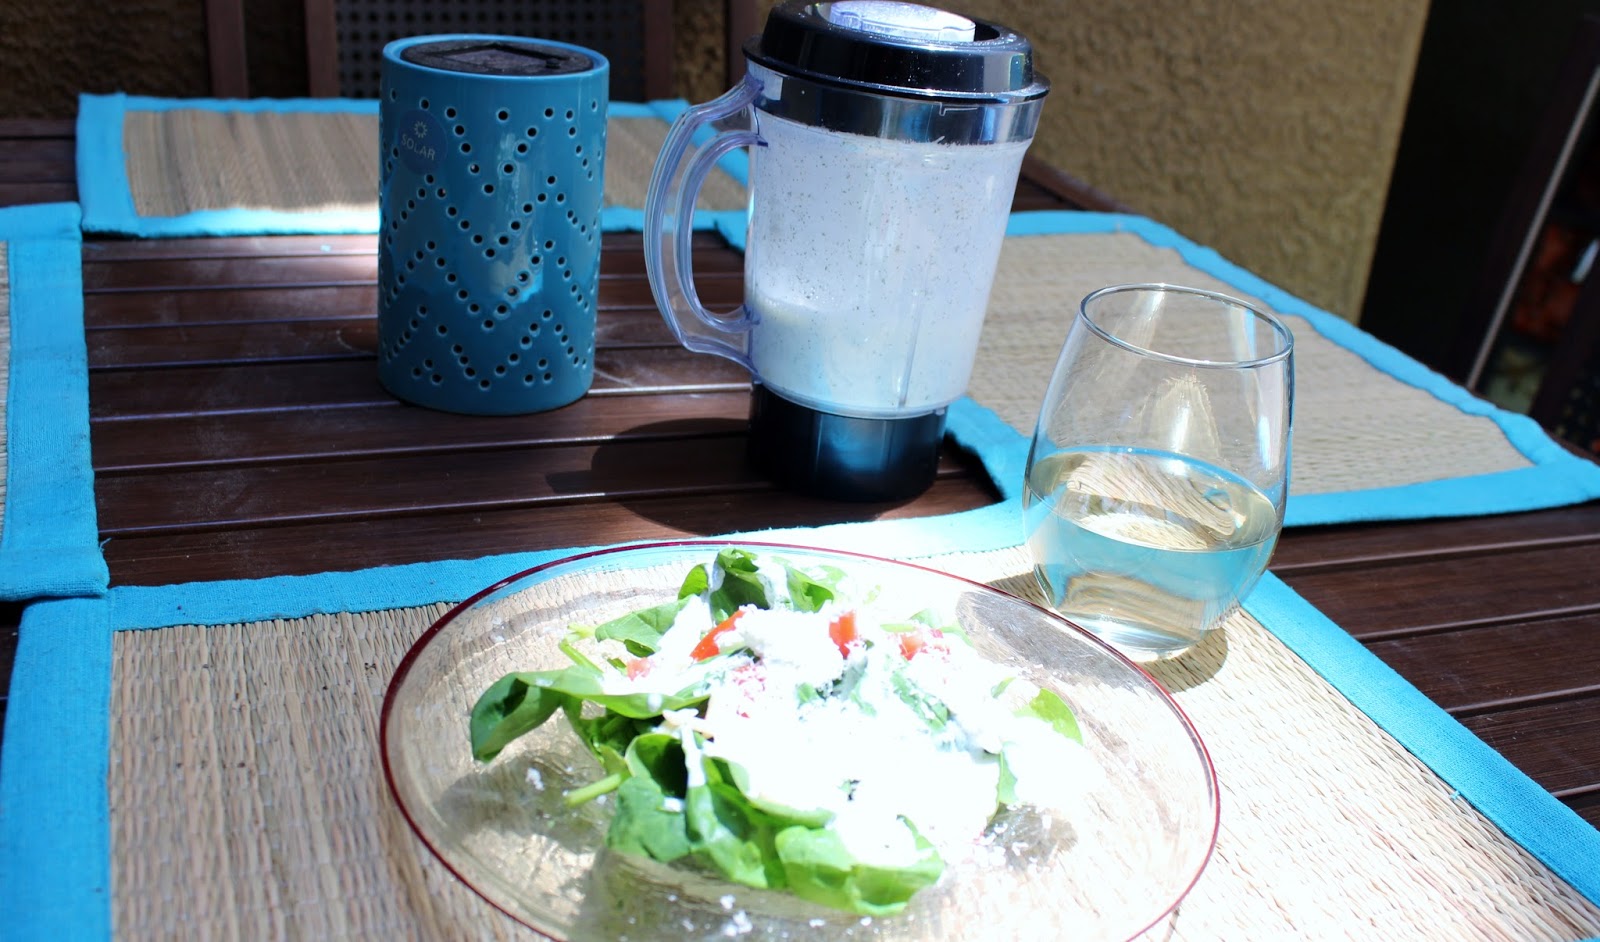
Have any of you seen the new salad dressing trend? Fewer calories when you buy salad dressing made with Greek Yogurt!! Sometimes it costs over $4 a bottle. Here is a recipe from "Your Grocery Budget Toolbox" by Anne Simpson of Authentic Simplicity.
  • 1 cup of sour cream or plain Greek yogurt
  • 1/4 cup of buttermilk (I make my own, 1/4 teaspoon of white vinegar or lemon juice in a measuring cup, fill to 1/4 cup with milk. Let stand for 5 minutes.)
  • 1 teaspoon of dried chives
  • 1 teaspoon of dried dill
  • 1 teaspoon of dried parsley
  • 1/2 teaspoon of garlic powder
  • salt and pepper to taste

Mix together in a bowl or blend in a blender(I like to use my magic bullet). Refrigerate several hours before serving. Use more milk for thinner dressing or less for a dip.

I also used some ricotta cheese from my mozzarella cheese
making experiments on this salad!!


Now that we've saved money on our Greek Yogurt, how else can we spend a little less frivolously? How can we be "faithful with few things?"

Thank You for reading my blog post. I hope you enjoyed it and took something good away with you.


May your joy be full,

Rachel


19 “Now after a long time the master of those servants came and settled accounts with them. 20 And he who had received the five talents came forward, bringing five talents more, saying, 'Master, you delivered to me five talents; here I have made five talents more. 23 His master said to him, 'Well done, good and faithful servant. You have been faithful over a little; I will set you over much. Enter into the joy of your master."
Matthew 25:19-23


If you like what you're reading, follow me on facebook:Mommy Who Loves God


Tuesday, July 2, 2013

Ways to Use and Repurpose a Gallon of Milk--Without Drinking It!! PART 2: Grain Free Lasagna and Grain Free Lemon-Whey Pie


As I woke up this morning, I looked over to my husband's side of the bed.He wasn't there. He was nowhere in sight. He was gone. As he is most weekday mornings when my son and I wake up. Yesterday, my two year old asked, “Where my daddy go, Mommy?” I used that moment to explain to him how hard his Daddy works for us. I told him “Daddy had to go to work. He goes to work every day and works really hard. When he works hard, his bosses give him pennies (this is how he understands money). The pennies Daddy works for pays for our house and our food and your milk and TOYS.” “Toys?” he said, “Toys and diapers?” Last grocery day we ended the shopping trip at  Wal-Mart for swim diapers and a toy. He was playing happily in the cart with his Nemo diapers and tractor until I told him to put them on the counter so I could pay for them.
This morning when he woke up he asked “Daddy go to work, to pay for my toys and diapers?” I confirmed he was correct and explained the whole thing to him again; I want him to know that Daddy works hard for all of our good things. It is important for children to understand how hard their father’s work for them. There is a reason Daddy can’t stay home all day and play cars with him. Someone has to pay for those cars.

As moms, I feel we sometimes don’t realize the importance of our relationship with our children. I am the person my son spends all of his time with. This gives us a special bond unlike any other; unlike the relationship he has with his Daddy. It is my responsibility to cultivate my son’s relationship with his father when he cannot be at home. At two years old, and probably through the early elementary school ages, he can’t possibly understand why Daddy isn’t home to play with him unless it is explained to him on his level. Right now, toys are his level. He understands toys. Now he is starting to understand that no matter who purchased his toy, Daddy “paid for it.”
This will also prepare him for another conversation one day. He may be able to more easily understand that our Father God gives us all good things because he has seen a good example of this from his own father. Or he may understand that our salvation is not free, someone had to pay for it. Jesus had to “pay for it,” however, he paid a lot more than pennies.

My husband works hard for us and serves our family well!! So how do I serve him back? I take care of our son and home. But sometimes we need to put forth a little more effort or thoughtfulness. It is good to let our husbands know how much we appreciate their efforts. I did this yesterday by making his favorite food with our homemade mozzarella and ricotta cheese. And then topped it off with one of the yummiest pies I have ever tasted!!!!

So, as promised:

 Grain Free Zucchini Lasagna and Grain Free Lemon-Whey Pie


I forgot to snap the picture before cutting it!!
Grain Free Zucchini Lasagna

Sauce Ingredients:  
  • 1lb. of Italian Sausage, preferably something all natural without monosodium glutamate (MSG).
  • 1 lb. of ground hamburger 
  • 1 onion, chopped 
  • 1 green bell pepper, chopped
  • 3 to 5 garlic cloves, minced 
  • 3  6 ounce cans of organic tomato paste
  • 3 cups of water 
  • 1 1/2 tablespoons of basil (use more if using fresh basil)
  • 1 1/2 tablespoons of oregano (use more if using fresh oregano) 
  • 1 tablespoon of honey   
I usually I make the sauce first because it takes the longest to cook. This sauce is completely sugar free and paleo friendly.  I also make this for spaghetti, which I use a Julian peeler to slice zucchini into noodles. There is no need to cook the “noodles,” just add them to the sauce for the last 10 minutes of cooking time.
If your onion and green pepper are not already chopped, do so now. I usually use my food processor to do this. (One at a time or they get mushy.)
      

Brown the sausage and hamburger in a large pot. Add onion,  green pepper and garlic, cook for about 5 minutes.
Stir in the tomato paste, water, basil, oregano and honey.
Cover and let simmer for 1 hour.

While the sauce is cooking, I usually slice the zucchini and make the cheese mix.


Noodles:
5 medium zucchini

Slice the zucchini with a mandolin at ¼ inch thick.


Salt the zucchini and let rest for at least 15 minutes.


Preheat oven to 400 degrees.

Cheese Mix Ingredients:
  • 1 ½ cups of parmesan cheese, grated
  • 2 cups of mozzarella cheese, shredded 
  • 16 ounces of ricotta cheese
  • 2 eggs  
In a small bowl, mix 2 eggs, parmesan and ricotta cheese. You can season this; I only added salt because the sauce is already seasoned.
I had to add ricotta to what we made yesterday. I had some from previous cheese making experiences. You can make your own ricotta without making the mozzarella if you want or you can buy some from the store. Maybe one day I’ll post about making only ricotta, but for now you can go to this website: http://www.instructables.com/id/Homemade-Ricotta-Cheese/?ALLSTEPS

When the sauce is finished simmering, you can assemble your lasagna.

Start with a light layer of sauce; it helps cook the zucchini noodles cook a little better.


Start a rotation of zucchini, cheese mix and sauce. Repeat. I made two layers. If your sauce or zucchini is thinner than mine, you may get three layers.


Top with your mozzarella and bake for 1 hour.
 An FYI about Homemade mozzarella, it doesn’t really melt into the ewey gooey cheese you are used to. It was more of a cheesy crispy layer on top.
Let it cool some before serving.

This recipe serves 6 to 8 people.


And my husband and two year old loved it!!

Grain Free Lemon-Whey Pie

This is a recipe I got from prairiehomestead.com. It calls for a pre-made crust, but I have adapted it to give you a wonderful grain free crust for the gluten intolerant. I really recommend the grain free crust, even if you aren’t gluten intolerant because the flavors blend incredibly well with this pie. It was truly delicious!!

Crust Ingredients:
  • ¾ cup of butter 
  • 1/3 cup of Organic coconut sugar 
  • 1 1/2 cup of blanched almond flour 
  • 1 1/2 teaspoons of bourbon vanilla 
  • 1 1/2 tablespoon of cold water      
Preheat oven to 350 degrees. Grease a 9inch pie dish. Beat together, or put in a food processor, butter, sugar, almond flour, vanilla and water. I used bourbon vanilla because I like the flavor, regular pure vanilla can be used. If you cannot find bourbon vanilla, it can be hard to find, I got mine for a reasonable price at Trader Joe's.

Press dough into pie dish.
 A little trick to gluten-free baking; press into dish with wet hands. The water keeps the dough from sticking to your fingers.
Bake for 30 minutes. Let cool.
Filling Ingredients:
  • 1 ½ cups of whey divided into 1 cup and ½ cup (it must be fresh whey, powdered whey will not work.) 
  • 1 cup organic sugar
  • 3 ½ tablespoons of arrowroot powder or organic cornstarch 
  • 3 egg yolks (save the whites for the meringue) 
  • 1 ½ tablespoon of butter, melted  
  • ½ teaspoon of salt  
  • ¼ cup of lemon juice
Preheat oven to 350 degrees, if it is not already done.
Bring 1 cup of whey to a boil in a medium saucepan.
In a separate bowl, whisk the sugar arrowroot powder and the remaining ½ cup of cold whey until smooth.
Add mixture into the hot whey, stirring constantly until it thickens.

In another small bowl, beat the egg yolks and combine with butter, salt and lemon juice.
Pour a small amount of the hot mixture into the egg yolk mixture and stir. This is called “tempering” and it ensures that you don’t end up with scrambled eggs in your lemon whey.
Add the tempered mixture back into the saucepan. Cook for an additional two minutes stirring constantly.
Pour the filling into your pre-baked pie shell. Set aside while you prepare the meringue.
Meringue Topping Ingredients:
  • 3 egg whites
  • ¼ teaspoon of cream of tartar
  • ¼ teaspoon of salt
  • ½ teaspoon bourbon vanilla extract
  • 6 tablespoons of organic sugar            
Using an electric mixer, beat egg whites, cream of tartar, salt and vanilla extract in a bowl until foamy, but not yet starting to thicken. Add one tablespoon of sugar and beat thoroughly. Repeat with the other 5 tablespoons, one tablespoon at a time. You want the sugar to dissolve completely.
Once all the sugar is added, continue to beat the mixture at medium high speed until it forms stiff, sharp peaks when you lift the mixer from the bowl.   

Spoon the meringue around the edges of the pie and use the back of  your spoon to gently “seal” it to the crust. This should keep it from shrinking. Once you have a ring of meringue around the outside, dump the remaining meringue to the center of the pie and smooth it out evenly.

You can use the back of your spoon or a spatula to lift it and give it a spiky appearance.
Carefully move it to the oven and bake for 12-15 minutes.

Let it cool fully on the counter.

If using the grain free crust, be sure to let the pie cool completely and scrape between the pie and the dish with a knife, or it will fall apart when trying to serve. However, if it falls apart, it will still taste delightful!!


Here are a couple of examples of how I try and let my husband know I appreciate him. What would make your husband feel noticed and appreciated? Do your children fully understand how hard their Daddies works for their family?

Thank you for reading my post. I hope you enjoyed it and found something useful. Tomorrow I’m going to show you how to make Greek yogurt in a crock pot. I will also give you a wonderful Greek yogurt Ranch Dressing Recipe. Stay tuned!!

May Your Joy be Full,

Rachel

You shall teach them diligently to your children, and shall talk of them when you sit in your house, and when you walk by the way, and when you lie down, and when you rise.

                                                                                Deuteronomy 6:7 (ESV)

Follow me on Facebook: Mommy Who Loves God


https://www.facebook.com/#!/mommylovesgod?fref=ts